If you decide that in the house or in the country there is not enough veranda, then it can always be completed. But first ask yourself: why do you need an additional extension? If purely for relaxing against the backdrop of nature, then it makes sense to get along with an open terrace or gazebo. The veranda is erected to increase the thermal insulation of the house, because it plays the role of a vestibule between the street and the front door, blocking the direct entry of cold masses into the premises. The side function of the extension - to be a resting place - will be fulfilled only if the room is spacious and insulated. Then in the winter you can sit over a cup of tea, contemplating the winter landscapes. Let's try to figure out how best to attach the veranda to the house so that it was warm in the winter and maximum air in the summer.
What should be considered before the start of construction?
Selection of materials
Since the veranda will become part of the main building, its style should coincide with the design of the house itself. It is recommended to use the same materials that make up the walls and roof of the house so that the structure looks harmonious.

If modern materials are used in the decoration of the house, then the glass veranda looks quite appropriate
You can also combine materials, connecting the house and the veranda with decoration. For example, if the house is brick-built, the roofing should be the same, and the walls of the veranda should be made of blocks, but the external decoration should be done with decorative plaster and it should be used to finish the foundation of the main building. It is definitely worth adding a wooden veranda to a wooden country house.
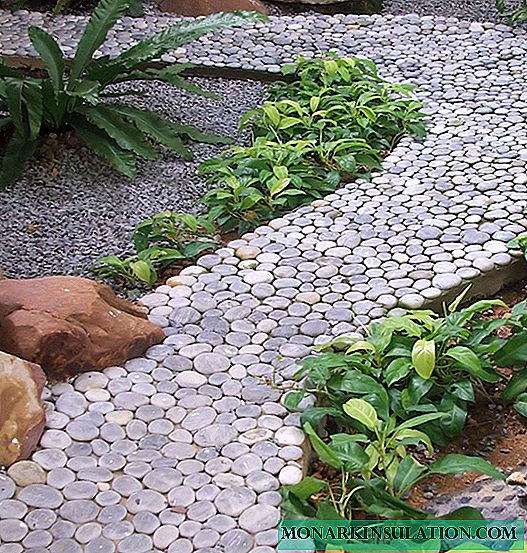
The best ideas for decorating the veranda can be found in the material: //diz-cafe.com/dekor/dizajn-verandy-na-dache.html

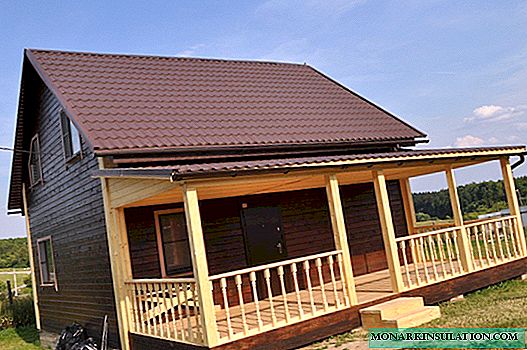
Wooden house and porch look like a single ensemble
Planning and legalizing the project
The veranda is always built so as to close the front door. Therefore, in a ready-made house, you cannot attach it from the side you want. Without going inside, this room will be torn off from the house, and you will have to carry food and tea from the kitchen across the street.
The size of the veranda is invented by the owners themselves, taking into account the number of people who could rest in it at the same time. For the needs of a family of 5-6 people, a 3x4 m building is enough. But here it’s worth considering the general view from the street. If you conceive a small veranda, and the cottage itself is two-story, it is unlikely that your architectural ensemble will look harmonious. But to small houses just the same you can attach a veranda to the entire width of the wall of the building. This will increase the usable area, and from the side it looks quite worthy.
But with any meter you will have to officially legalize the building. And not after construction, but before! When you come up with the design of the veranda and consider its general appearance, go to the special department involved in the design of buildings and order the design of the veranda. After its manufacture, you need to go to the architectural department of the city to get a building permit and make changes to the design of the house. Why is it important to do this in advance? It takes about 2 months to draft and approve, so it is better if they fall in the winter, when the construction season has not yet begun.
Marking and layout of the site
Before you start work, you need to prepare the site. To do this, remove the fertile layer (about 15 cm) and take it out to the garden or flower beds. The site is leveled and proceed with the breakdown. According to the dimensions indicated in the project, mark the boundaries of the future veranda. To do this, iron pins or wooden pegs are driven into the corners of the building and pull the twine tightly around the perimeter.

The outer edge of the breakdown should coincide with the size of the veranda, and the inner step back to the width of the foundation
Foundation Building: Fill Rules
Most often in Russia, for a veranda attached to the house, they make a strip or column foundation, equal in depth to the foundation of the main building. It is recommended not to bind them in one monolith, because the house and the veranda have different weights, which means different degrees of shrinkage. And so that a heavy building does not attract a light structure, put the veranda on a separate base. For this, a gap of up to 4 cm is left between the foundation of the house and the veranda.
Attention! When creating the foundation, you should consider the features of the soil in your area and the total weight of the building. Lightweight foundations on heaving soils can "play", and then the veranda will move away from the wall of the main building. In addition, they are not designed for heavy walls, for example, of brick, and can shrink under their pressure.
Strip foundation
It is used for the construction of large verandas made of brick or blocks that are covered with a heavy roof (slate, metal tile, etc.). The easiest way to build a strip foundation of the veranda to the house of concrete.

The heaviest porch will stand on the strip foundation
For this:
- A trench is being dug up (calculate the dimensions according to the foundation of the house).
- The formwork is placed at a height equal to the height of the future foundation (or slightly higher). It is made of boards, knocking into shields.
- Concrete is prepared in the following proportion: 1 part cement, 3 parts sand and 6 parts crushed stone.
- The first layer of concrete is poured to the bottom and reinforced with stones to make about 10 cm.
- Then fill in the next portion, add stones again, etc.
- For the top layer of concrete, stones are not used, but they smooth the surface with a trowel and leave to cool (3-4 days).
- If there is heat, then spill a couple of times a day to avoid cracking the foundation.
Column foundation
If the veranda is frame or wooden, then you can put it on a columnar foundation. To secure against heaving, dig holes to a depth below freezing in your area (more than a meter). For a small and light veranda, it is enough to put the columns only in the corners. For large, it is worth making a series of intermediate columns with a step of 50-60 cm between them.

The pillar foundation can be made of concrete, blocks or red brick.
Progress:
- Dig holes.
- The bottom of each of them is covered with a 20-cm layer of sand.
- Concrete is poured to the surface of the earth and awaits curing.
- They coat the finished pillar with bitumen and fill the cracks between it and the ground with sand.
- The aerial part of the column is created from brick or block masonry, bringing it to the height of the main foundation or slightly lower. Be guided so that there is about 30 cm to the finish floor of the veranda.
Installation of rough floors
Work order:
- We fill the underground space with expanded clay for insulation.
- We cover the foundation with a double layer of roofing material (both tape and columnar).
- We fix the lags on the foundation, having pre-coated them with an antiseptic.
- We install edged boards (thickness 5 cm).

Lags are pre-saturated with antiseptic
You can make a concrete floor, but in this case you will have to carry out additional thermal insulation work, because the base will draw cold from the ground, and the floor on the veranda will be constantly cold.
The construction of the frame of the wooden veranda
Consider how to build a veranda of wood. To do this, mount a frame of beams, measuring 10x10 cm. Procedure:
- On the finished draft floor, put the bars for the lower trim, connecting in the corners with a "direct lock".
- Cut out in bars every half meter grooves for uprights.
- They put racks, fixing them with nails and brackets.
- A bar for the upper harness is mounted on top of the racks.
- Near the slope of the roof of the house, a run-beam is nailed on which the rafters will lie. It must be taken on anchor bolts (and all racks adjacent to the building).
- The rafter system is mounted.
- The whole tree is treated with an antiseptic.
Also, material on the construction of a verandah in a summer cottage type will be useful: //diz-cafe.com/postroiki/veranda-na-dache-svoimi-rukami.html

Bars for the lower harness are laid on the foundation, waterproofed with roofing material

The rafter system is attached to the bars of the upper harness
Features of the design of the roofing cake
Most often, roofs are made shed. Moreover, they are more sloping than the roof on the house. Creating a roofing cake on the veranda is carried out in the same way as installing the roof of an ordinary house.

A continuous or intermittent crate is stuffed on the rafters, depending on the roofing
Only if you have a mansard type house, then one of the layers you did a vapor barrier. A vapor barrier is not needed in the veranda, because the under-roof space will not be used. In addition, with high-quality insulation of walls and floors, a vapor barrier layer is contraindicated. After all, a couple of the room must go somewhere. And it will seep through the ceiling into the attic, and from there it will fly out. To do this, it is worthwhile to lay a special superdiffusion membrane as a waterproofing layer, which does not allow moisture from the outside, but the vapor from the inside freely passes. True, it is not used for steel and metal coatings, because they can rust from condensation. For metal tiles, they buy a special condensate film.
You can learn about how to insulate the veranda yourself from the material: //diz-cafe.com/postroiki/kak-uteplit-verandu-svoimi-rukami.html

Superdiffusion membrane consists of microscopic pores resembling funnels
Wall cladding and window installation
After creating the rough floors, you can sew up the frame, leaving openings for windows and doors. For this:
- In the locations of the windows we install a window sill, which should be about half a meter from the floor. We fix a board to vertical racks.
- We sew the frame with materials that will keep warm and fit the main building. From the inside it can be plywood, and on top of it - a lining, from the outside - siding or wood. But it is necessary to lay a layer of insulation between them and a waterproofing film (on both sides of the insulation) so that moisture from the street and steam from the inside does not penetrate it. Do not forget to leave window openings.
After you have made the frame of the veranda to the house, insert windows and doors.
Article in the topic: How to glaze the terrace: features of the work

When installing vertical racks, they make a step between them equal to the width of the windows

Walls are better to be sewn up from two parties, laying a heater inside
Also, it is necessary to pay attention that the door should not be located opposite the internal door leading to the house. Otherwise, drafts cannot be avoided. It is best to do it from the end so that the cold air that flies in when opening does not find a way into the living quarters.
Features of creating a brick or block veranda
If the veranda is attached to a brick house, then it is logical that its walls are made of brick or blocks, ennobling them with decorative plasters.

The brick porch should have a solid foundation, since the construction will be difficult
Installation Tips:
- An extension is best placed on a strip foundation.
- For masonry, grasp yourself only if you have construction skills.
- Since the building will not be large, it is enough laying in half a brick, and lay out the inside of the blocks.
- Fill the voids with expanded clay.
- Finish such a veranda with drywall or plaster, and then - paint.
Pay special attention to the insulation of each structural element. Even those owners who first put an insulated veranda, after a couple of seasons are looking for ways to make it warmer. Because freezing corners and faded doors are not too pleasing to the eye. And in Russia, severe winters are not uncommon.